
AI Outfit Designer: How to Design Your Own Outfit with BeSpoke
Published · Updated
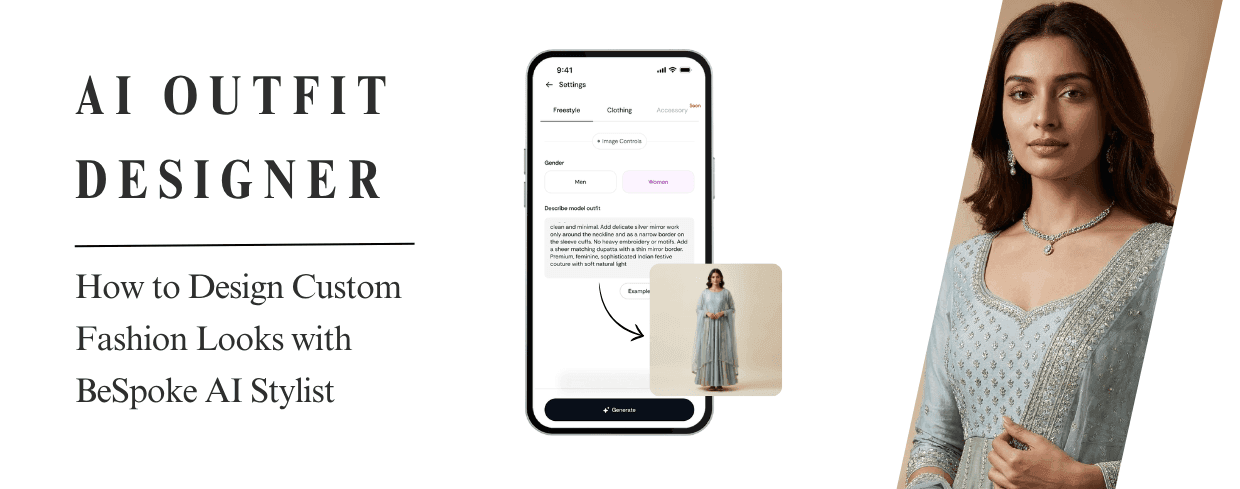
You may have opened a shopping app, scrolled for twenty minutes and closed it without finding the outfit you had in mind. The colour was close, but the neckline was wrong. The silhouette worked, but the detailing felt too heavy. With BeSpoke AI Stylist, you can start from the other direction: describe your idea and use the Designer feature to generate a visual outfit concept.
This is a text-to-outfit generation tool, not a clothing manufacturing service. It turns a half-formed idea into an image you can review, refine and keep as a reference before deciding what to buy or discuss with a tailor.
AI Outfit Designer at a Glance
BeSpoke Designer turns written descriptions into outfit concepts. Freestyle starts with an open prompt, while Clothing adds more structured controls. Enrich expands a short idea into a fuller description, which you should review before generating. Refine the result and save or download the version you like. The output is a visual reference, not a finished garment, sewing pattern or guarantee of fit. Accessory and 360-degree options are marked as coming soon in the screens shown here.
What AI Fashion Design Actually Means
An AI outfit designer uses text-to-image generation to turn a written description into a clothing concept. You describe the silhouette, colours, fabric appearance and decorative details; the system generates an image based on that brief. In BeSpoke, you can do this without drawing a fashion sketch or using specialist design terminology.
The value is in exploring an idea before committing to it. A generated image can help you explain a neckline or colour combination, but it does not establish measurements, fabric performance or whether every detail can be constructed. A tailor or designer still needs to work out how a physical garment will be made.
Open Studio, select Designer, then choose New Design. The interface shown here offers Freestyle and Clothing modes, with Accessory marked as coming soon. Labels and available controls can change between app versions.
Freestyle Mode
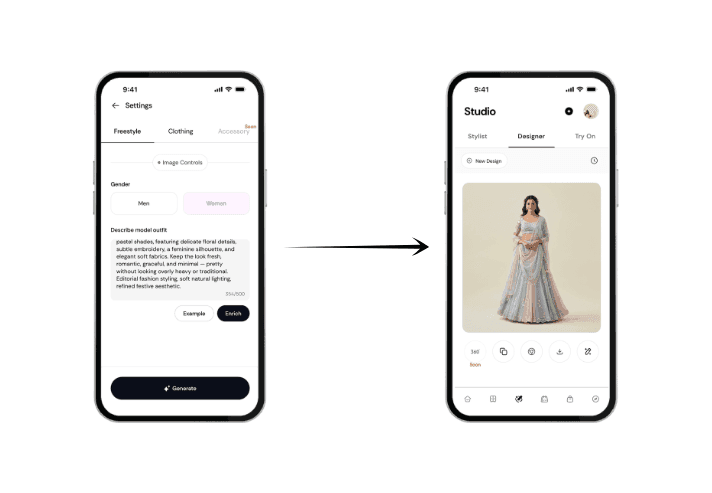
BeSpoke Freestyle screen with Men and Women options, a 500-character prompt field and Enrich, beside a pastel outfit result.
Freestyle is the open canvas. Select Men or Women, then describe the outfit you are imagining. The screen shown here has a 500-character limit, with room for a silhouette, fabric appearance, colour palette, embellishment and mood. You do not need a reference photograph to begin.
For example: "A pastel floral lehenga with a softly flared skirt, subtle embroidery, a sheer matching dupatta and a light, romantic festive feel. Full-length studio image." The result will be an interpretation of your description, so check which details were retained rather than expecting an exact match on the first attempt.
Freestyle works well when you know the mood but have not chosen the garment details. Start with a clear idea and add only the details that matter most.
Clothing Mode
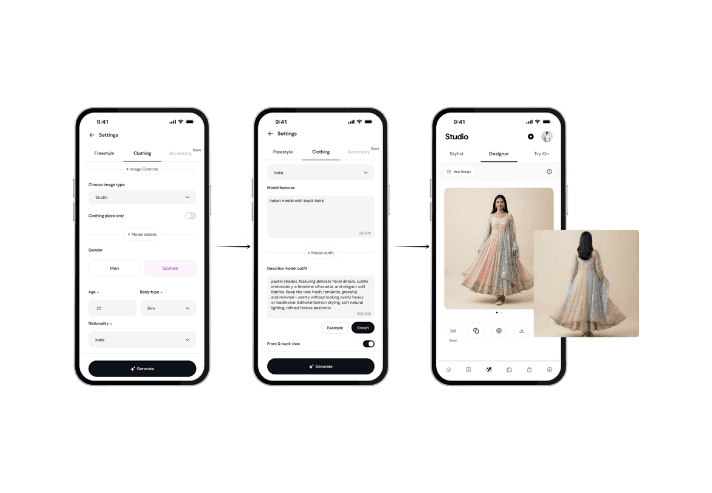
BeSpoke Clothing mode showing model settings, an outfit description and front-and-back views of a pastel floral design.
Clothing mode provides a more structured setup. The screens here show image controls and model details, including gender, age and body type, alongside the outfit description. There is also a front-and-back view option. You can still describe a specific garment, such as a kurta set or co-ord, while adjusting how the concept is presented.
The Enrich Tool: Turning a Rough Idea Into a Fuller Prompt
You might know you want something "elegant but not too heavy" without knowing how to describe the neckline, drape or amount of embellishment. The Enrich button gives you a more detailed starting point.
Type a short description and tap Enrich to expand it. Then read the revised prompt before tapping Generate. Keep the details you like and remove anything that changes your idea, such as an added dupatta, heavier embroidery or a different fabric appearance.
For example, "clean and minimal, silver mirror work only on the neckline" gives Enrich a clear priority. The expanded wording should still preserve that restriction. More detail is useful only when it describes the outfit you actually want.
From Prompt to Outfit Concept: How Generation Works
Once your description is ready, tap Generate. Review the outfit image for the elements you specified: silhouette, colour, neckline and embellishment placement. The examples here show full-length model images, although the presentation can vary with your prompt and settings.
The result screen includes download and edit controls. Use Edit when the first version is close but needs a change, such as lighter embroidery or a warmer colour. Make one clear request at a time and check the whole image afterwards, because an edit may also alter details you wanted to keep.
Save or download a version you like before moving on. Keep it as a reference for future styling or tailoring discussions. Processing time can vary, so check the app for any current access or usage limits before generating several versions.
Style inspiration can start with a look from an event, campaign or your own saved images. Instead of searching for an exact replica, identify the elements you like: a floral overlay, a structured co-ord silhouette, a bold drape or festive detailing.
Describe those elements in your own words and combine them with your preferences. You might borrow the softness of one look while changing its coverage, colour or shape. Our guide to building an outfit colour palette can help you turn a visual reference into a specific set of shades.
The four photographs below are style references, not examples of outfits generated by the app. They offer four directions for a prompt:
The Pretty One
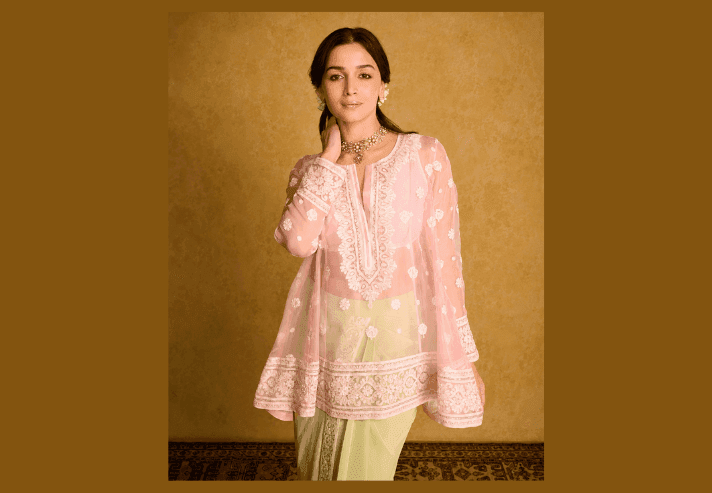
Woman in a blush-pink embroidered outfit with a sheer floral dupatta.
Pastels, florals and soft detailing for a romantic look. Describe a pale palette, gentle volume and light embellishment.
The Classic One
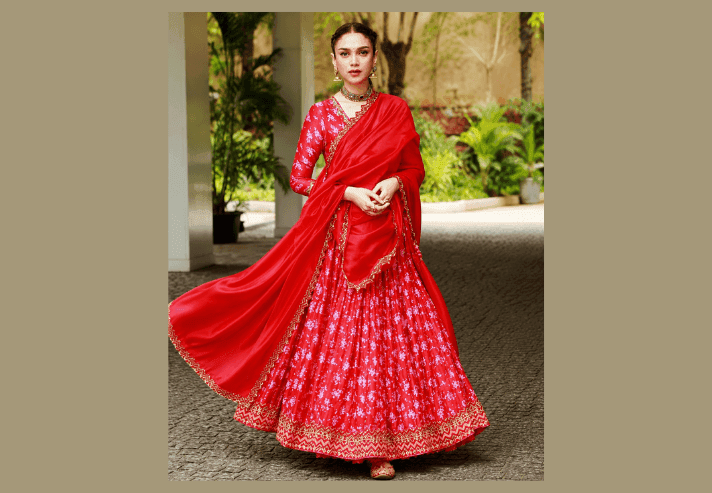
Woman wearing a red floral traditional outfit with a matching flowing dupatta.
Traditional silhouettes and rich colour. Start with the garment shape, then specify the fabric appearance and level of detailing.
The Modern One
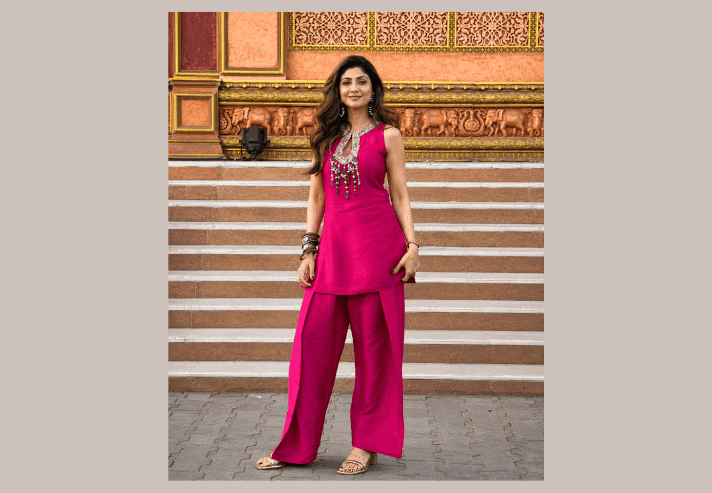
Woman in a bright pink sleeveless kurta and wide-leg trousers styled as a contemporary co-ord.
Co-ords and fusion silhouettes. Describe the top length, trouser shape and one contemporary detail rather than relying on "modern" alone.
The Statement One
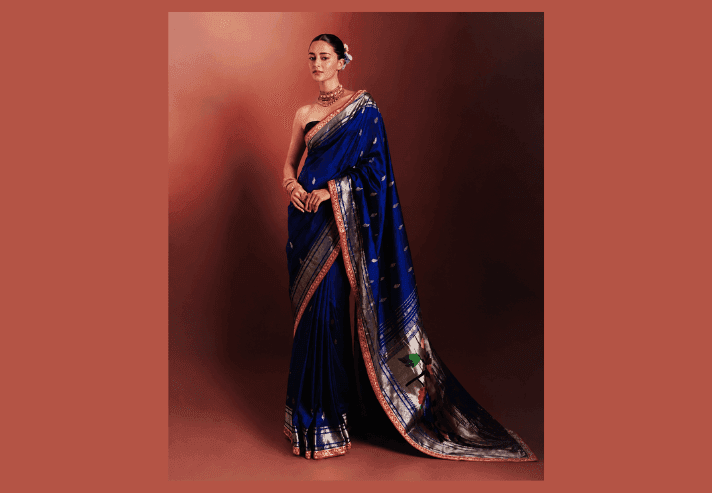
Woman wearing a deep blue saree with gold-toned borders and jewellery.
Bold colour, decorative borders and dramatic draping. Choose the main focal point so the prompt does not ask every element to compete.
Choose a direction, then add the specific features that make it yours. Describing a look is more useful than naming a public figure and expecting the tool to infer every detail.
Shopping is useful when you are ready to compare available products. Designer serves a different purpose: exploring what you want before searching for it. You can compare silhouettes, test colour combinations and keep the most useful visual references.
This does not replace a skilled tailor, a real garment or a fitting. It gives you a clearer brief to work from. Before buying or commissioning anything, consider how the idea could fit into a capsule wardrobe rather than becoming a one-off piece with nothing to pair it with.
Who Gets the Most Out of the Designer Feature
Anyone planning a festive or event outfit can use Designer to explore silhouettes and colour families before approaching a boutique or tailor. Fashion enthusiasts can use it to put a visual to an idea they find difficult to explain. Small designers and boutique owners may also use the images for early client discussions, while keeping technical design and garment construction separate.
Tips for Getting Better Results From the Designer Feature
Start with the garment and silhouette, then describe the details. "A straight-cut kurta with full sleeves" gives a clearer brief than "a beautiful outfit." Specify where decoration belongs, such as "mirror work on the neckline and sleeve cuffs only," rather than asking for "some embroidery."
Name the fabric appearance you want, such as linen texture, a silk-like sheen or an organza overlay. Our guide to Indian textiles can help you find more precise vocabulary. A generated texture is only a visual interpretation, not proof of the fabric or craft technique used in a real garment.
Add a colour palette and the intended mood, then use lighting or background details only if presentation matters. After using Enrich, check that it has not changed your main requirements. During refinement, make one change at a time and compare the new version with the previous one.
A useful prompt structure: garment + silhouette + colours + fabric appearance + embellishment placement + optional image style.
Designer helps you explore an outfit idea; the Digital Closet helps you organise clothes you actually own. Once you have a useful concept, check which existing shoes, accessories or layers could work with it. BeSpoke also offers outfit planning and virtual try-on as separate parts of the app.
Use the Outfit Planner to organise real looks for upcoming occasions. For a photo-based preview, read how virtual try-on works. A visual preview is not a guarantee of sizing or fit, and a Designer result should not be assumed to transfer automatically into every other feature.
A Practical Example of the Workflow
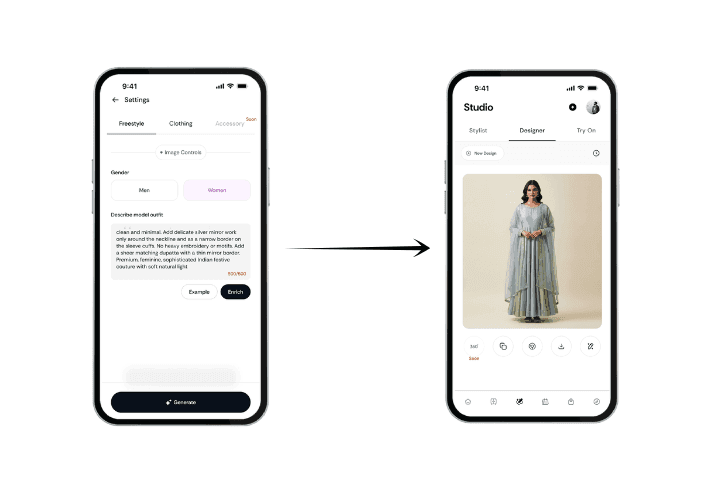
BeSpoke Freestyle prompt and Generate button leading to a pastel floral lehenga design in the Designer tab.
Suppose you want a light festive look in pastel shades, similar in direction to the example below. Open Freestyle and begin with a short, specific description:
"A pastel pink and mint lehenga with delicate floral details, subtle embroidery, a softly flared skirt and a sheer matching dupatta. Keep the overall look light and romantic, with a full-length studio view."
Tap Enrich, read the expanded prompt and remove any unwanted additions. Generate a version, then review the colour balance and amount of decoration. If it looks too heavy, an edit request could be: "Reduce the embroidery while keeping the pastel palette and skirt shape." Keep the version that best communicates your idea, then discuss fabric, construction and fit with a tailor before commissioning it.
Is the Designer feature only for women's outfits?
No. The Freestyle and Clothing screens shown here both include Men and Women options. Available controls may differ between app versions.
Can I generate a design without a reference photo?
Yes. Freestyle supports a written description, so you can begin with text rather than an uploaded reference photo.
Does the app manufacture the outfit I design?
No. Designer generates a visual outfit concept. It does not produce a finished garment or confirm how the design will be constructed.
What happens to my generated designs?
Use the available save or download controls to keep a design for later reference. Check where your version of the app stores it rather than assuming every result is automatically added to the Digital Closet or Outfit Planner.
How is Clothing mode different from Freestyle?
Freestyle begins with an open outfit description. Clothing provides a more structured setup, including the model and image controls shown in this guide, alongside your outfit brief.
Start with an outfit idea you can explain in one sentence. Build on it in Designer, keep the result you like, and use it to make your next styling or tailoring conversation more specific.
Sources and Further Reading
BeSpoke AI Stylist on the App Store
Official feature overview and release notes for Designer, Studio and wardrobe tools.
BeSpoke AI Stylist on Google Play
Official overview of the Digital Closet, outfit planning and virtual try-on.
Google Cloud: Prompt and Image Attribute Guide
Guidance on clear image prompts, subject, context, style and iterative refinement.
Adobe Firefly: Writing Effective Text Prompts
Guidance on specific, descriptive prompts and revising image-generation results.
Written by BeSpoke AI Stylist Editorial Team
Published: 31/08/2026
Last updated: 31/08/2026
Ready to upgrade your style game? Download BeSpoke AI Stylist and let your AI stylist take it from here.

Author
Neeraj Bansal